
A properly configured GPU runs much faster than a CPU. Recent tests prove this point – similar training code takes just 40ms on a CUDA-enabled GPU but needs 250ms on CPU. This translates to a 6x boost in speed. These speed improvements make GPU optimization crucial for developers who build compute-heavy applications.
The right hardware choices and setup determine the best GPU performance. Take the RTX 3060 Ti GDDR6X – it comes with 2nd Generation Ray Tracing Cores and 3rd Generation Tensor Cores that work well for computational tasks of all types. But getting the most from your GPU also depends on CPU allocation. Many graphics applications need lots of CPU power even with GPU acceleration. Some virtual environments even need a dedicated virtual CPU just to process graphics data.
This piece covers everything developers should know about setting up 6x GPUs. You’ll learn about choosing compatible motherboards and power supplies. The focus stays on spreading workloads among multiple devices. We’ll show you proven techniques to track performance, spot bottlenecks, and implement solutions that help you get the most value from your GPU investment.
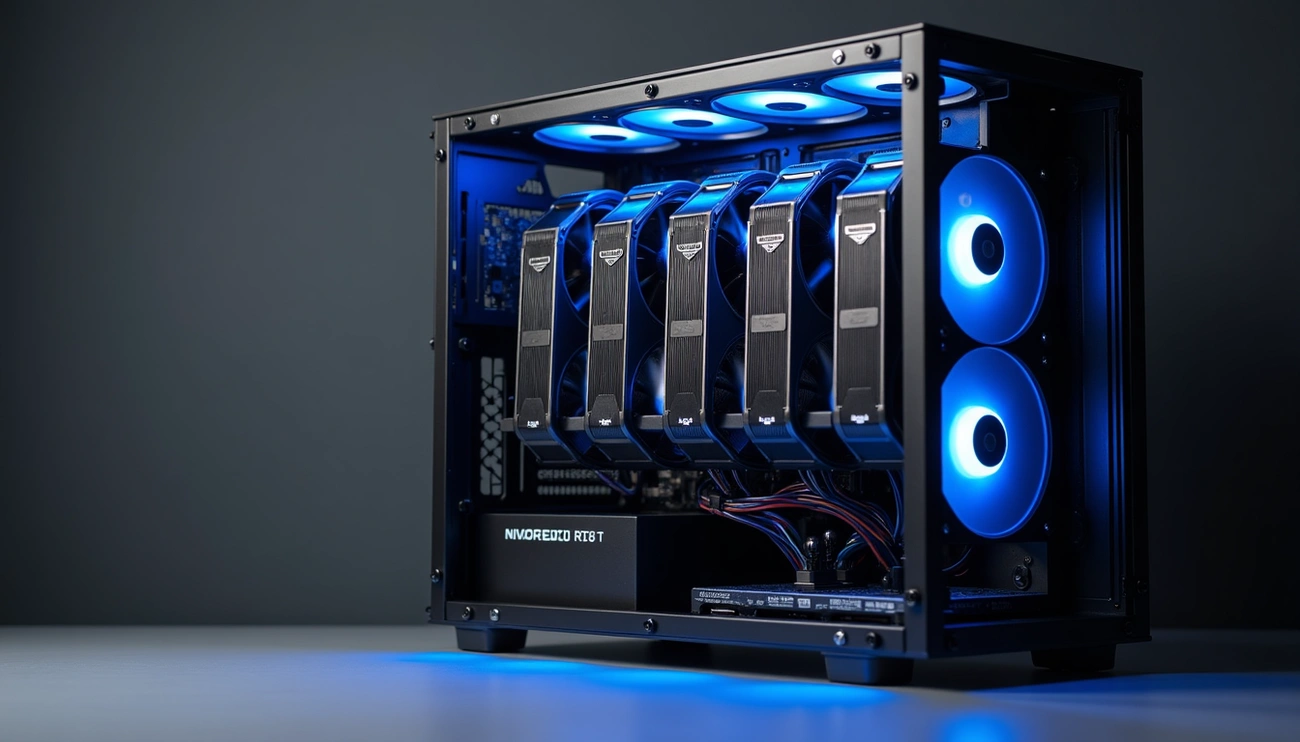
Hardware Requirements for 6x GPU Configuration
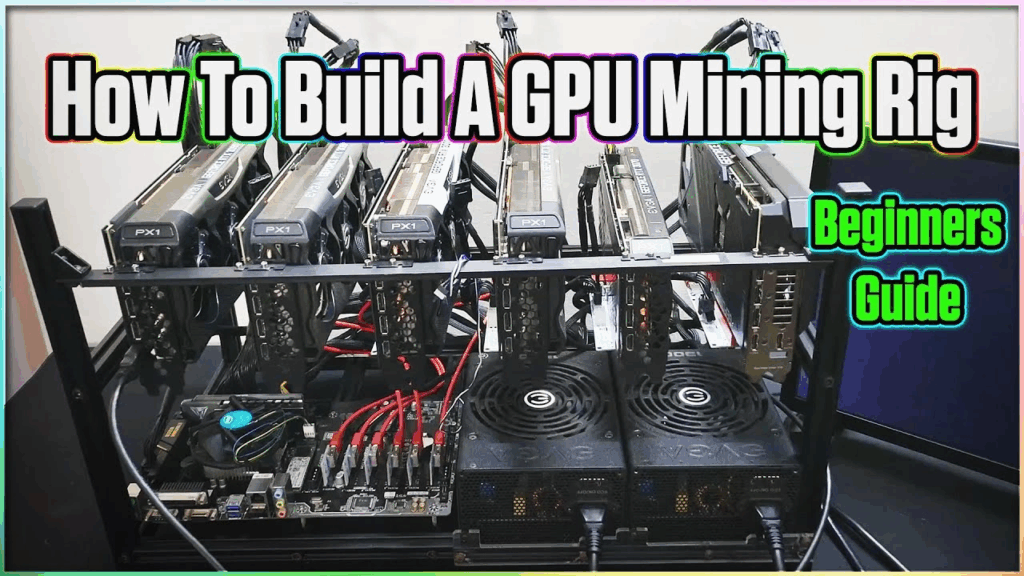
Image Source: YouTube
Building a 6x GPU configuration needs you to think over power supply capacity, motherboard compatibility, and cooling solutions. These powerful systems need specific hardware components that can handle multiple high-performance graphics cards at once.
Minimum PSU Wattage for 6x GPU Mining Rig
The power supply requirements for a 6x GPU setup follow a simple formula. You’ll first need to calculate total GPU power consumption by multiplying each card’s TDP (Thermal Design Power) by the number of cards. Next, add 150W for supporting components (CPU, motherboard, RAM), then multiply by 1.25 to follow the 80% capacity rule.
To name just one example, see a rig with six RTX 3060 Ti cards (each with 200W TDP):
- 6 × 200W = 1200W for GPUs
- Add 150W for system components = 1350W
- Apply 80% rule: 1350W × 1.25 = 1687.5W
This calculation points to a minimum 1700W PSU capacity. All the same, mining operations usually use less power since RTX 3060 Ti cards typically draw around 130W when optimized for mining. This could lower requirements to about 930W before applying the 80% rule.
PCIe Slot Layout and 6x GPU Motherboard Compatibility
Finding motherboards that support six full-sized GPUs can be tricky. Specialized mining motherboards exist but they often use PCIe x1 slots, which limit bandwidth and performance for compute-heavy applications. Regular consumer motherboards usually offer only 1-3 PCIe x16 slots, making them unsuitable for 6x GPU setups.
Workstation-grade motherboards offer the best solution. The Supermicro M12SWA-TF provides six PCIe x16 slots, though prices start around €729. On top of that, consumer CPUs like Intel’s i9-12900KS support only 20 PCIe lanes, so they can’t drive six full-bandwidth GPUs at once.
Professional workloads benefit from Xeon W-series processors with about 112 PCIe lanes paired with W790 motherboards. Models like the W790 SAGE SE come with seven PCIe 5.0 x16 slots.
Cooling and Airflow Considerations for Multi-GPU Setups
Multi-GPU configurations make thermal management crucial. High-performance GPUs generate lots of heat—each card might draw 300-700W—so cooling systems must handle 2-3kW per server rack.
GPUs need proper spacing between them to allow enough airflow and prevent thermal throttling. Cases should have mesh or perforated panels to make air movement easier and support multiple cooling fans. The best cooling setup includes:
- Front intake fans that bring in cool air
- Rear and top exhaust fans that push out hot air
- High-static-pressure fans that move air through dense GPU heatsinks
Liquid cooling works better than air cooling alone for extreme workloads. You can choose from hybrid GPU coolers to custom water-cooling loops that keep all cards at steady temperatures.
The system’s surroundings affect cooling performance too. Room temperature should stay between 20-25°C for GPUs to work their best. Regular maintenance, like cleaning dust and applying new thermal paste, helps maintain cooling efficiency over time.
Installing and Verifying GPU Drivers
The right driver installation is the foundation of any multi-GPU setup. Hardware assembly might seem straightforward, but software setup needs careful attention to compatibility and verification steps. This ensures you get the best possible performance.
NVIDIA Driver Installation for RTX 3060 Ti GDDR6X
The RTX 3060 Ti GDDR6X shows remarkable performance. It outperforms the RTX 2080 SUPER and this is a big deal as it means that the RTX 2060 SUPER by about 40%. Here’s how to install drivers for this card in a 6x GPU setup:
You can download the right GeForce Game Ready driver through NVIDIA’s GeForce Experience application. The “Drivers” tab within the application will help you find the latest compatible version.
You could also do a clean installation by following these steps:
- Visit the NVIDIA driver download page
- Select “GeForce RTX 30 Series” and “GeForce RTX 3060 Ti”
- Download the executable file
- Run the installer with administrator privileges
- Select “Custom” installation option
- Check “Perform a clean installation” to remove old driver files
Your system needs a restart after installation to apply driver changes correctly.
Verifying CUDA Toolkit and cuDNN Compatibility
Deep learning and parallel computing applications on a 6x GPU setup need perfect CUDA Toolkit and cuDNN compatibility. These components must work together seamlessly:
The RTX 3060 Ti works with recent CUDA versions, but each cuDNN version needs specific CUDA Toolkit installations. NVIDIA’s documentation shows that cuDNN 9.12.0 works with both CUDA 13.x and 12.x versions, though driver requirements differ between platforms.
Linux systems need NVIDIA driver version 580.65.06 or higher for CUDA 13.x compatibility. Windows systems require version 527.41 or newer for CUDA 12.x. NVIDIA suggests using cuDNN 9.12.0 with CUDA 13.0 for the best results.
Check your CUDA installation with:
nvcc –version
This command shows your installed CUDA version and confirms successful toolkit installation.
Checking GPU Recognition with nvidia-smi
NVIDIA’s System Management Interface (nvidia-smi) helps you verify GPU recognition and monitor performance in 6x GPU setups. This command-line tool comes with standard NVIDIA drivers on Linux and 64-bit Windows systems.
Running nvidia-smi shows a detailed table with:
- Driver version
- CUDA version
- GPU model identification
- Memory usage statistics
- Power consumption metrics
- Current utilization percentages
These commands are useful for multi-GPU setups:
nvidia-smi -L # Lists all GPUs with their UUIDs
nvidia-smi –query-gpu=gpu_name –format=csv # Returns GPU names in CSV format
nvidia-smi -pm 1 # Enables persistence mode for continuous workloads
Communication errors in nvidia-smi usually point to driver installation problems or conflicts. Make sure that:
- NVIDIA drivers are installed correctly
- No conflicts exist with nouveau drivers (Linux)
- The NVIDIA kernel module loads properly
Multi-GPU setups need PCIe generation and interconnect bandwidth verification:
sudo nvidia-smi topo –matrix
This command reveals important details about inter-GPU communication capabilities, which matters most for distributed training workloads across all six GPUs.
Mapping and Assigning GPUs to Workloads
Getting the most out of 6x GPU setups depends on smart workload distribution. The right way to assign tasks will give optimal resource usage and stop bottlenecks from slowing down your processing.
Using torch.device() for Manual GPU Assignment
PyTorch makes it simple to assign operations to specific GPUs when you have multiple cards. You can use the torch.device() method as your basic approach to pick which GPU to use:
device = torch.device(“cuda” if torch.cuda.is_available() else “cpu”)
model = model.to(device) # Move entire model to available GPU
You can target specific cards by their index number when working with 6x GPU configurations:
device = torch.device(“cuda:2”) # Select third GPU (zero-indexed)
tensor = tensor.to(device) # Move tensor to specified GPU
Operations run automatically on the GPU where your input tensors live, whatever device you selected. Cross-GPU operations will throw errors unless you specifically allow them through methods like copy_() or to().
Multi-GPU Training with DataParallel and DistributedDataParallel
PyTorch gives you two ways to spread training across multiple GPUs. The basic DataParallel works well for single machines with multiple GPUs:
model = nn.DataParallel(model)
model.to(device)
This setup uses GPU 0 as the master to split batches and sync gradients. The biggest problem is other GPUs must wait for GPU 0 to finish its work.
DistributedDataParallel (DDP) works better by letting each GPU handle data on its own:
# Initialize process group
torch.distributed.init_process_group(backend=”nccl”)
local_rank = int(os.environ[“LOCAL_RANK”])
torch.cuda.set_device(local_rank)
model = DistributedDataParallel(model, device_ids=[local_rank])
DDP cuts down communication between GPUs, which makes it perfect for 6x GPU setups. Each GPU runs its own process and syncs gradients during backward passes automatically. DDP scales well across multiple machines, unlike DataParallel which only works on one machine.
GPU Passthrough Configuration in Virtualized Environments
GPU passthrough lets virtual machines directly access physical GPUs without emulation at almost bare-metal speeds. This helps a lot in virtualized 6x GPU environments that need isolated workloads.
Setting up GPU passthrough requires:
- Hardware check – your CPU needs IOMMU and SR-IOV support
- SR-IOV enabled in BIOS/UEFI settings
- Hypervisor configured for GPU passthrough
- GPUs assigned to virtual machines
Virtual machines get their own dedicated GPU resources, which works great for parallel deep learning or rendering. Remember that VMs with passthrough can’t be live migrated since they’re tied to specific hardware.
GPU partitioning could work as another option in high-performance computing. It lets multiple VMs share parts of one physical GPU, though you’ll see some performance impact.
Performance Monitoring and Bottleneck Detection
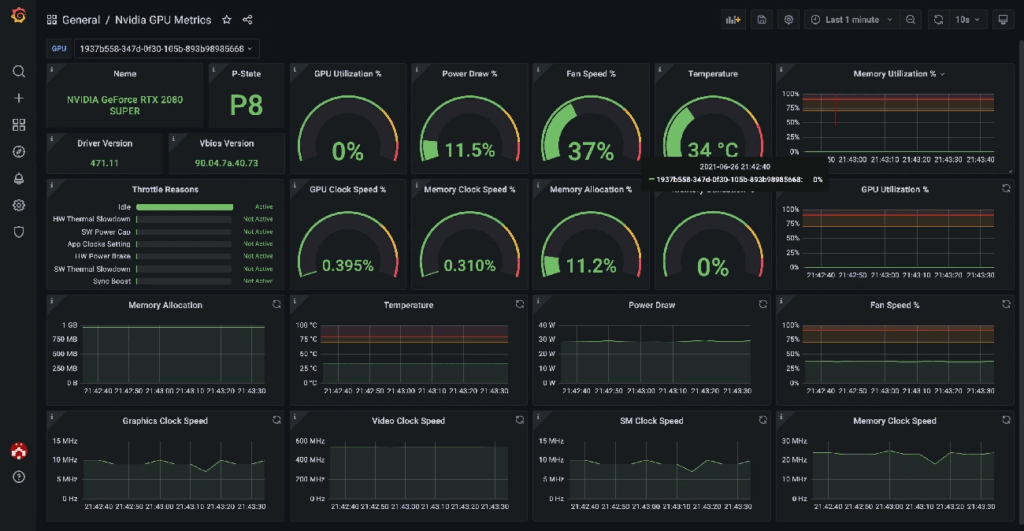
Image Source: Grafana
Monitoring tools are a great way to get crucial insights about 6x GPU performance. Developers can spot bottlenecks and make better use of resources. The best computational output needs constant metric analysis and quick workload adjustments.
Tracking GPU Usage with nvidia-smi and gpustat
NVIDIA System Management Interface (nvidia-smi) helps you monitor GPU performance. This command-line tool gives complete details about GPU usage, memory, temperature, and power consumption. You can get immediate updates by using:
nvidia-smi –loop=1
The data updates every second and lets you see performance changes. You can also get specific information by customizing your query:
nvidia-smi –query-gpu=power.draw,utilization.gpu,fan.speed,temperature.gpu –format=csv
gpustat gives you a more accessible interface with similar features. This simple Python tool shows a clean overview of GPU stats, perfect for quick system checks. You can install it with:
pip install gpustat
Identifying CPU-GPU Transfer Bottlenecks
Low GPU utilization despite high CPU usage usually points to data pipeline issues. The CPU might not prepare and move data fast enough to keep the GPU busy. The GPU becomes the performance bottleneck when it shows high utilization with low CPU usage.
These signs help you spot transfer bottlenecks:
- GPU usage stays under 80% while CPU usage remains high
- GPU usage shows short inactive periods
- High PCIe bandwidth use without much GPU computation
Batch Size Tuning for Optimal GPU Utilization
Batch size affects GPU usage and training efficiency. Larger batches mean better GPU utilization through parallel processing, but they need more memory. Finding the right batch size needs systematic testing.
Start by slowly increasing the batch size as you watch GPU usage. The perfect size maximizes GPU use without memory errors. Watch training accuracy along with usage metrics, since very large batches might hurt model convergence.
For 6x GPU mining rigs or computational clusters, each GPU’s batch size should match its capabilities. Batch sizes between 32 and 512 work well for computer vision tasks, though the best values depend on your model’s design and available memory.
Troubleshooting and Optimization Techniques
Getting the best performance from complex 6x GPU setups means solving some common optimization challenges. These powerful systems face specific problems that need targeted fixes.
Solving Out-of-Memory Errors in 6x GPU Mods
GPU VRAM allocation that exceeds available capacity leads to out-of-memory errors. You can start by reducing batch size as a quick fix, but this might not always work. Another approach is to wrap validation code with torch.no_grad(). This stops unnecessary gradient calculations and reduces memory use by a lot. You can also free up memory with explicit garbage collection:
import gc
gc.collect()
torch.cuda.empty_cache()
The nvidia-smi command shows which GPUs have free memory. This helps you spread workloads to GPUs that aren’t being used much.
Thermal Throttling and Fan Curve Adjustments
GPUs slow down their clock speeds when they get too hot. This thermal throttling shows up as “SW Thermal Slowdown” (code 0x20) in monitoring tools. Your performance drops even if fans aren’t running at full speed.
Blower-style cards work better than multi-fan designs in multi-GPU setups, which might surprise you. These cards push heat straight out of the case instead of moving it around inside. This stops heat problems from spreading between tightly packed GPUs.
Power Limit and Clock Speed Tuning with nvidia-smi
You can optimize performance-per-watt by fine-tuning power limits with nvidia-smi. Here’s the command:
sudo nvidia-smi -pl [WATTS]
Check the right power ranges first:
nvidia-smi -q -d POWER
This shows you the minimum and maximum values you can use. Run sudo nvidia-smi -pm 1 to make power management settings stick. You can also keep performance stable by setting fixed memory and graphics clock frequencies with nvidia-smi -ac.
Conclusion
A properly configured 6x GPU setup is a major investment that delivers returns through faster computing performance. GPUs can run up to 6x faster than CPUs when you set them up right. These speed gains come from getting several key factors right, starting with reliable hardware foundations.
You’ll need the right power supply capacity, compatible motherboards with enough PCIe slots, and good cooling solutions as the backbone of multi-GPU systems. Professional workstation motherboards combined with processors that support enough PCIe lanes give you the expansion capability you need for serious workloads. The heat from six high-performance GPUs in one system makes thermal management crucial.
The right driver setup helps discover the full potential of your GPUs. Your CUDA Toolkit and cuDNN versions must match exactly. Tools like nvidia-smi let you verify everything works. It’s smart to check GPU detection often to make sure all six devices work properly in the system.
Spreading workloads across multiple GPUs takes smart planning. PyTorch’s DistributedDataParallel works better than DataParallel because each GPU can process data on its own. GPU passthrough makes virtualized environments better by giving virtual machines direct GPU access without slow emulation.
System monitoring tools are a great way to get insights into how everything runs. Nvidia-smi and gpustat show GPU usage patterns that help find bottlenecks between CPU and GPU. The batch size you pick affects both GPU use and training speed – the best size depends on your model’s design and memory.
Expert troubleshooting tackles common issues in complex GPU setups. You can fix memory errors, stop thermal throttling, and tune power limits with nvidia-smi to keep performance strong under heavy loads. Blower-style cards work better than multi-fan designs in tight multi-GPU setups, which might surprise you.
Becoming skilled at GPU performance takes constant fine-tuning and tweaking. Developers who master these setup techniques will without doubt get the most from their GPU investment. This turns previously impossible workloads into everyday tasks.
FAQs
1. What are the key benefits of undervolting an RTX 4070 GPU?
Undervolting an RTX 4070 can significantly reduce power consumption and heat output while maintaining most of its performance. It can lower power draw by up to 25% with only a 5% performance loss, resulting in a cooler and more efficient GPU.
2. How does the RTX 4070’s efficiency compare to previous generation cards?
The RTX 4070 is extremely efficient, offering up to 40-50% reduction in power draw compared to an undervolted RTX 3080 while delivering similar performance. This efficiency gain is largely due to the move from Samsung 8nm to TSMC 4nm process.
3. What tools are needed to undervolt an RTX 4070?
The main tool needed is MSI Afterburner, which allows you to adjust the voltage/frequency curve of the GPU. You’ll also want to use benchmarking tools like 3DMark TimeSpy to test stability and performance after undervolting.
4. Is undervolting safe for the GPU?
Yes, undervolting is generally safe when done properly. It actually reduces stress on the GPU by lowering power consumption and heat output. However, you should test extensively for stability after undervolting to ensure the card remains stable under load.
5. What are some good starting undervolt settings for the RTX 4070?
A good starting point is 2610 MHz at 0.91V, which can reduce power draw by about 25% while maintaining 95% of stock performance. For a more modest undervolt, try 2805 MHz at 1.0V, which can reduce power by 5-15% with minimal performance impact.